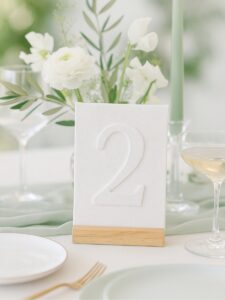
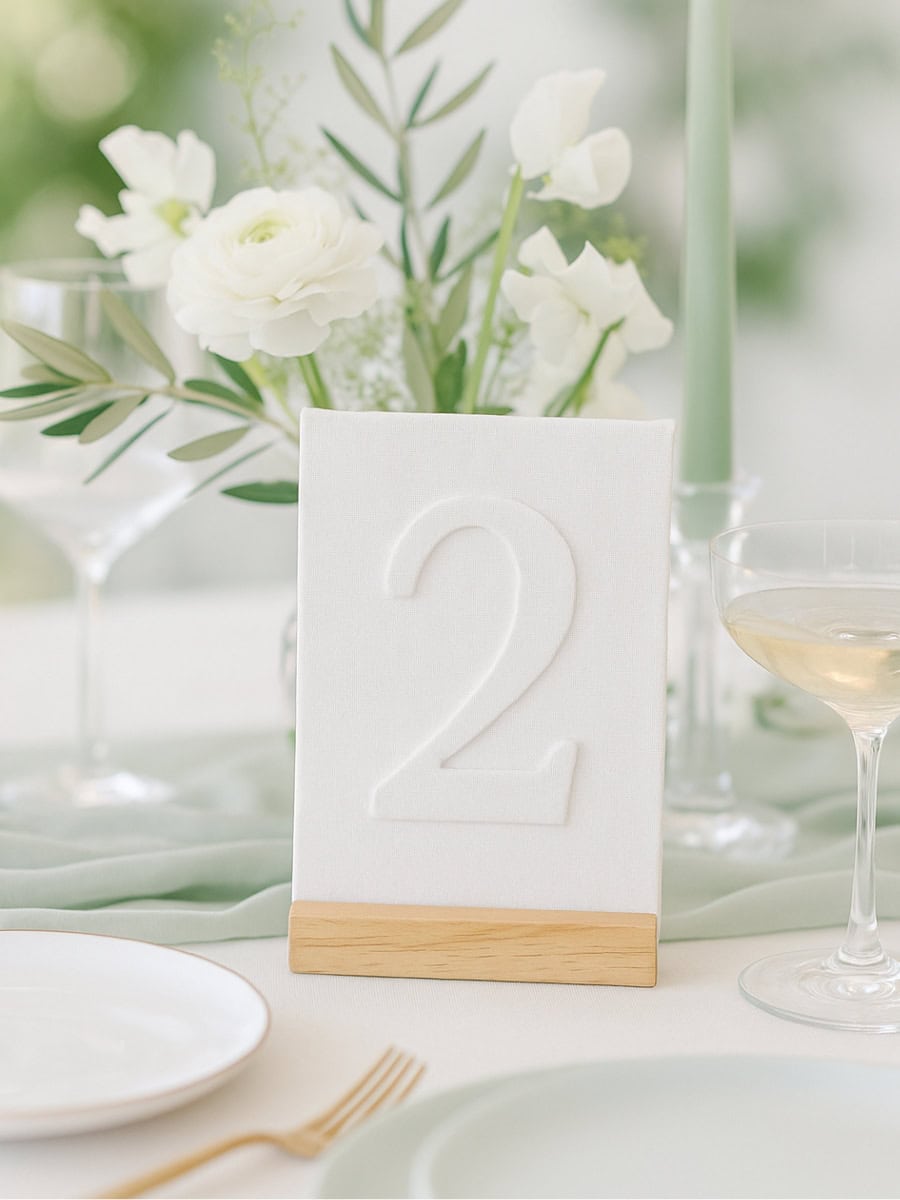
The first time I saw embossed linen table numbers I was obsessed.
A friend asked me to make a set for an event and I realised there was no clear how to anywhere, so I documented everything. The good news is they are much easier than they look.
The only fiddly part was getting a polished finish where the fabric meets at the back, and I found a simple trick that makes the join disappear so it looks like one piece of cloth.
I tested a few routes including Cricut cut numbers versus precut wood numbers, Mod Podge versus tacky glue, and greyboard versus wood. I wanted to see what gives the sharpest embossed edge for the least effort and cost.
Below, I share the exact method I used, options if you do not have a cutting machine, and tips for batching them quickly while keeping that quiet luxe, sculpted look.
Quick Overview
Skill level: Beginner–Intermediate
Time: ~5–10 minutes per board (after setup) + drying time
Approx. cost: £1–£2 per board (stand extra)
Jump to: Materials & Tools · Steps · Troubleshooting
Materials & Tools
Materials (choose your options)
Boards/Bases
- 2 mm greyboard/chipboard (easy to cut; fits 3 mm wood-block stand slots)
- Pre-cut wood/canvas panels (fastest; no cutting)
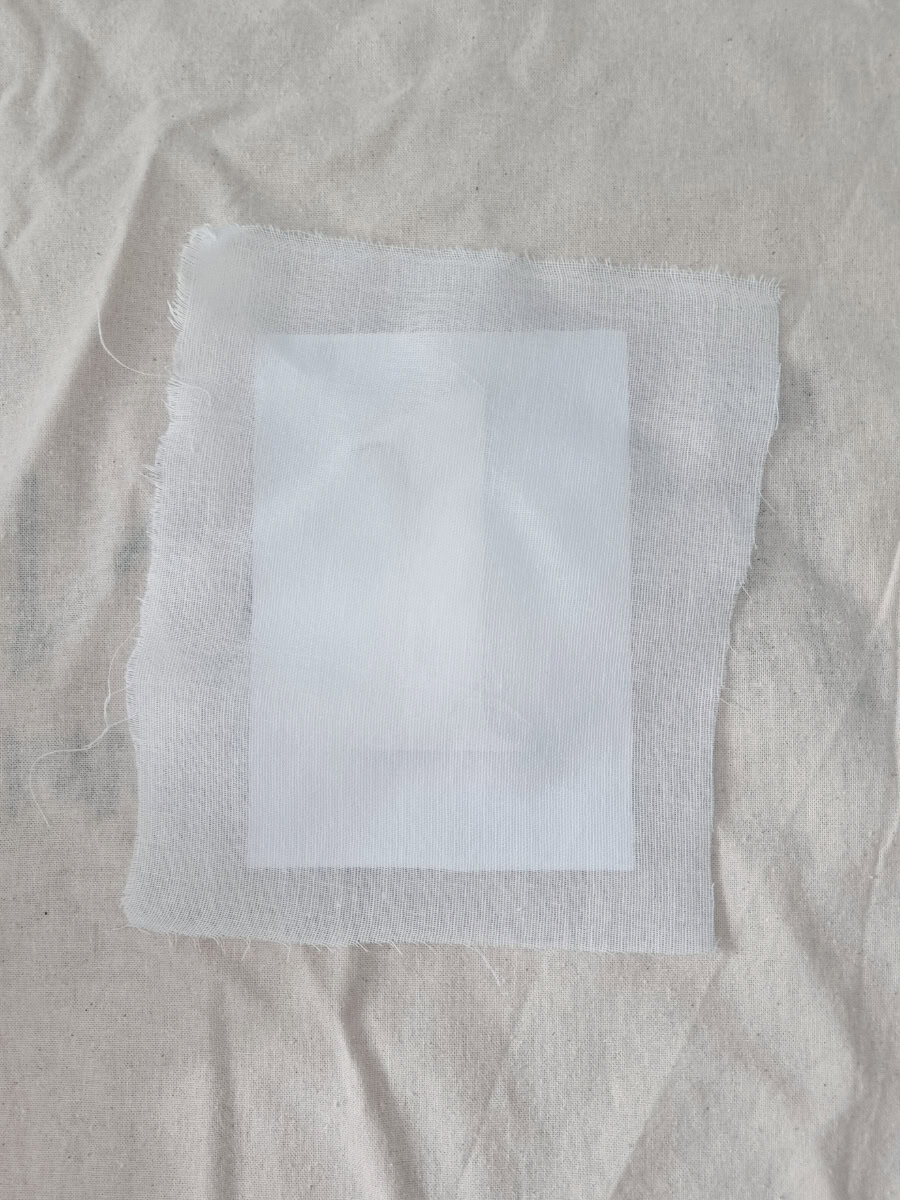
I used 10 cm tall numerals on A6/5×7 boards. You can go smaller, just keep comfortable margins all round so the emboss reads cleanly.
Fabric
- Lightweight linen, plain weave (looser/medium weave embosses best).
Numbers (design layer)
- Pre-cut wood numbers –
- Cricut-cut numbers from 2 mm kraft/greyboard
- Hand-cut card numbers (budget, slower)
Adhesives
- Tacky glue (for numbers + fabric wrap)
- or Mod Podge Matte (works well for the fabric layer; dries clear)
Paint
- White acrylic paint for boards and numbers
Tools
- Craft knife
- Metal ruler
- Cutting mat
- glue brush
- Scissors
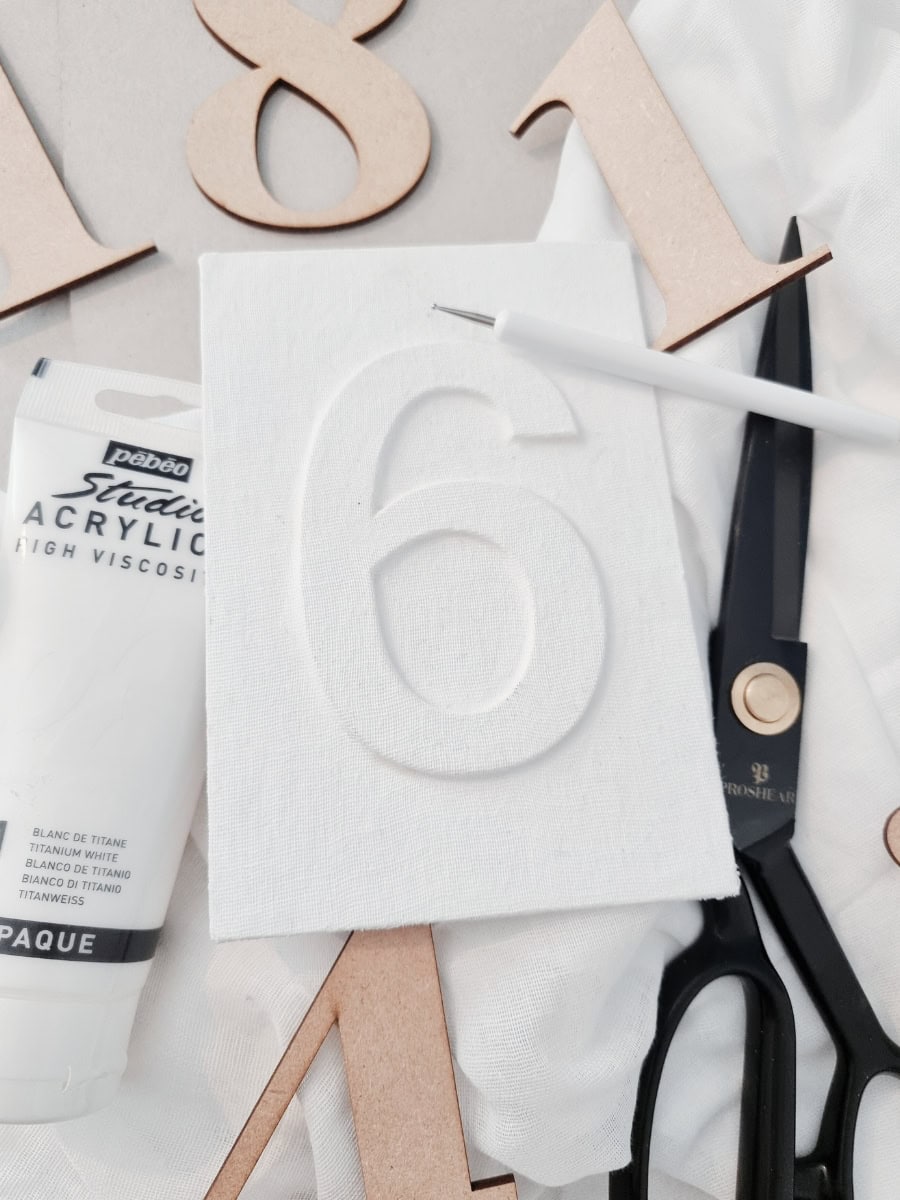
- Embossing stylus (ball-tipped)
Step-by-Step Method
1. Prep the bases
Cut 2 mm greyboard into A6 (105×148 mm) or approx. 5×7 in panels. I quarter a larger sheet to get four A6 boards. Lightly sand any fuzzy edges and wipe off dust so the fabric sits perfectly smooth.
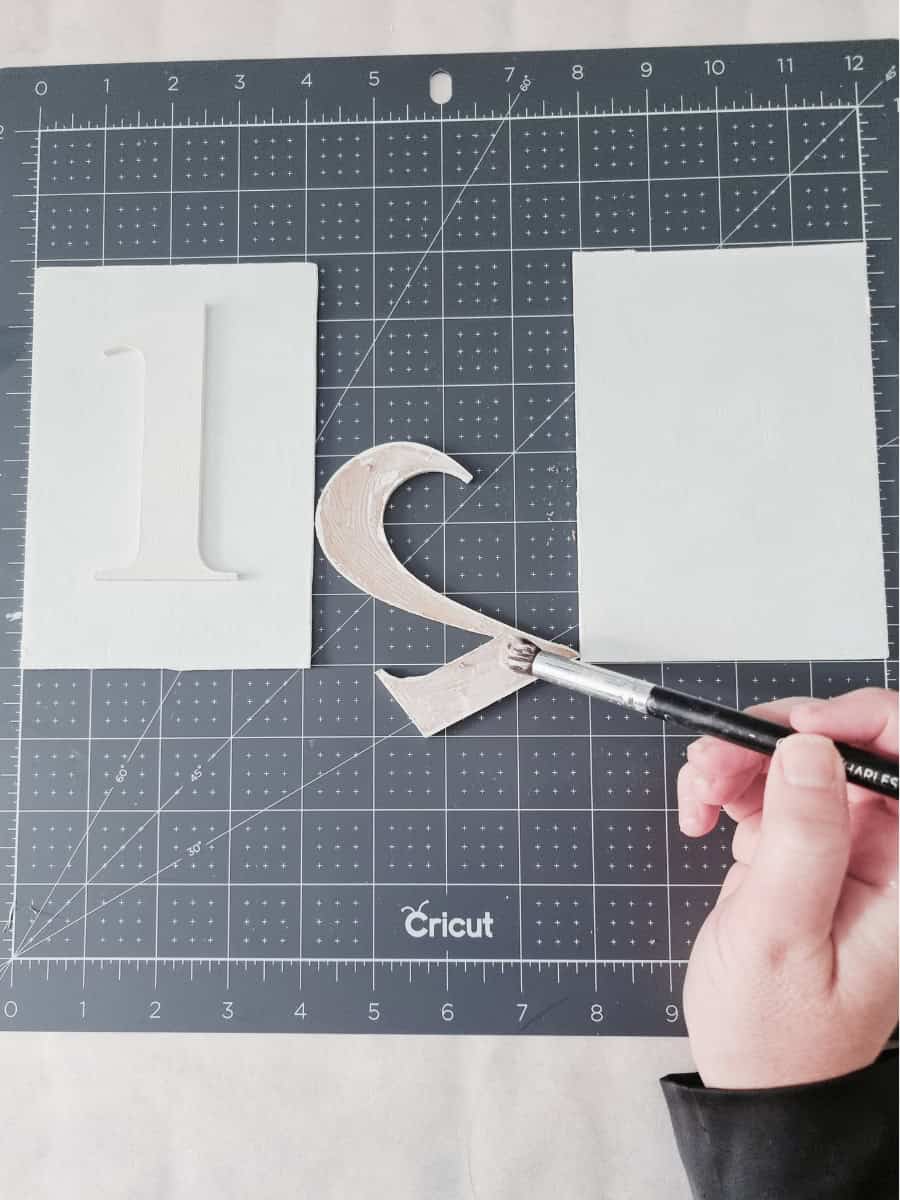
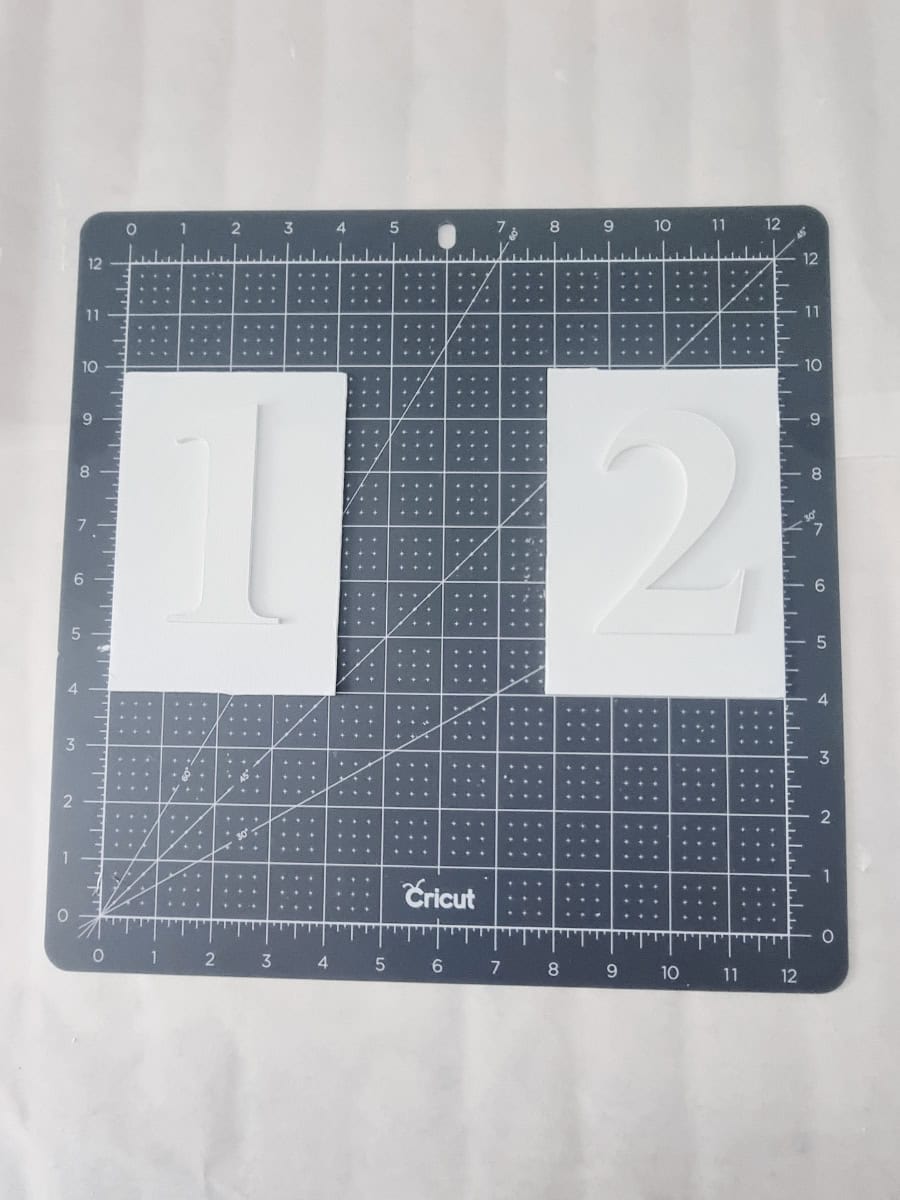
2. Make or source the numbers
- Cricut Maker: Cuts 2 mm kraft/greyboard cleanly (strong grip mat, multiple passes).
- Pre-cut wood numbers: Fastest and neatest, around £7 a set.
- Hand-cut card: Budget-friendly but slow—patience required.
I used 10 cm tall numerals on A6/5×7 boards. You can go smaller—just keep comfortable margins so the emboss shows clearly.
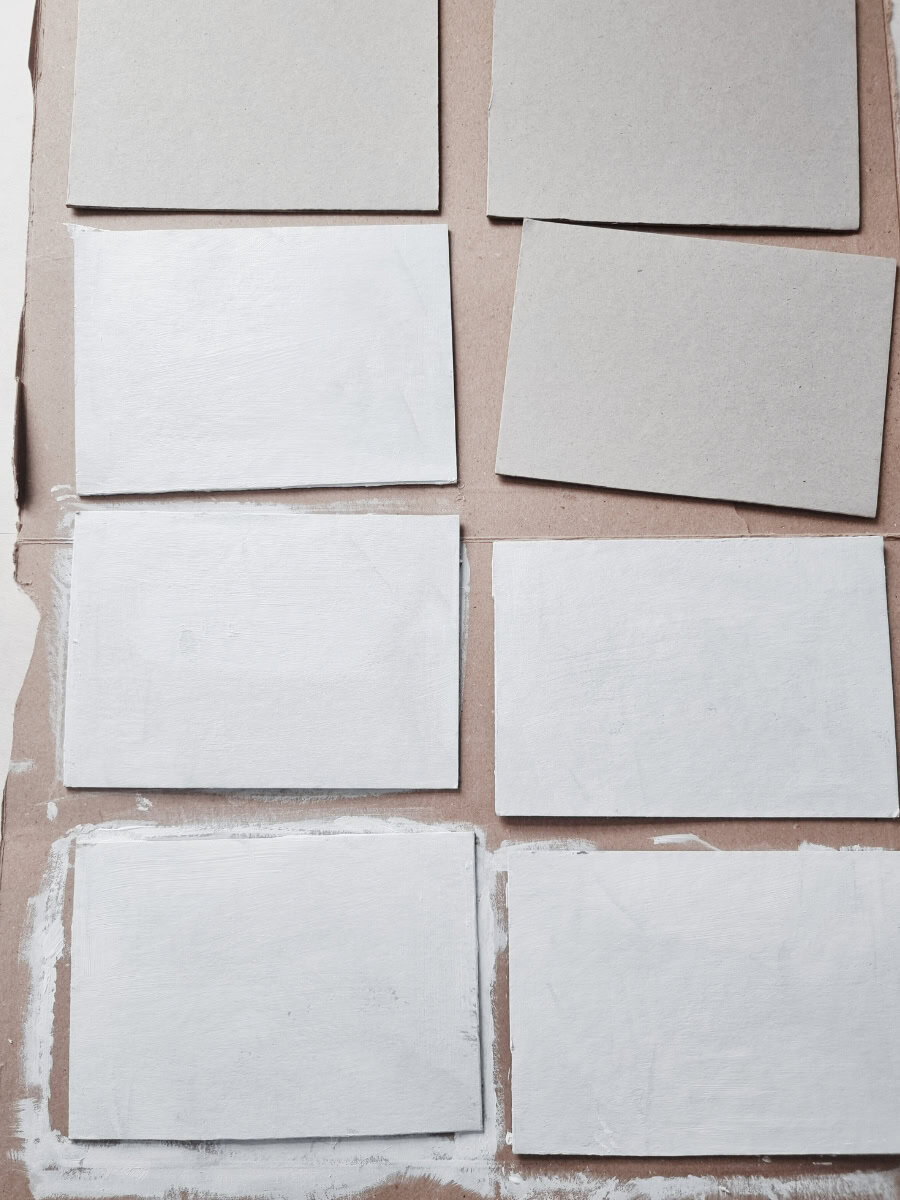
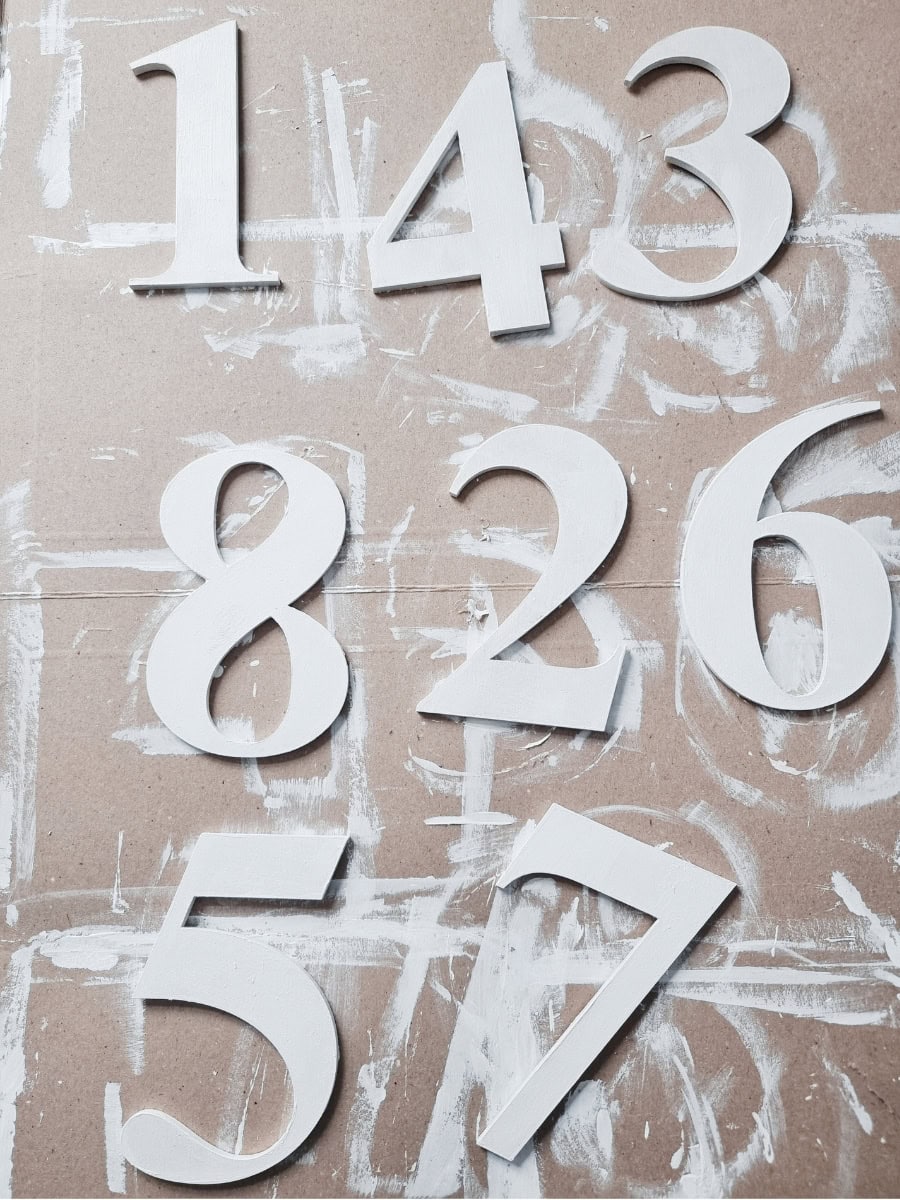
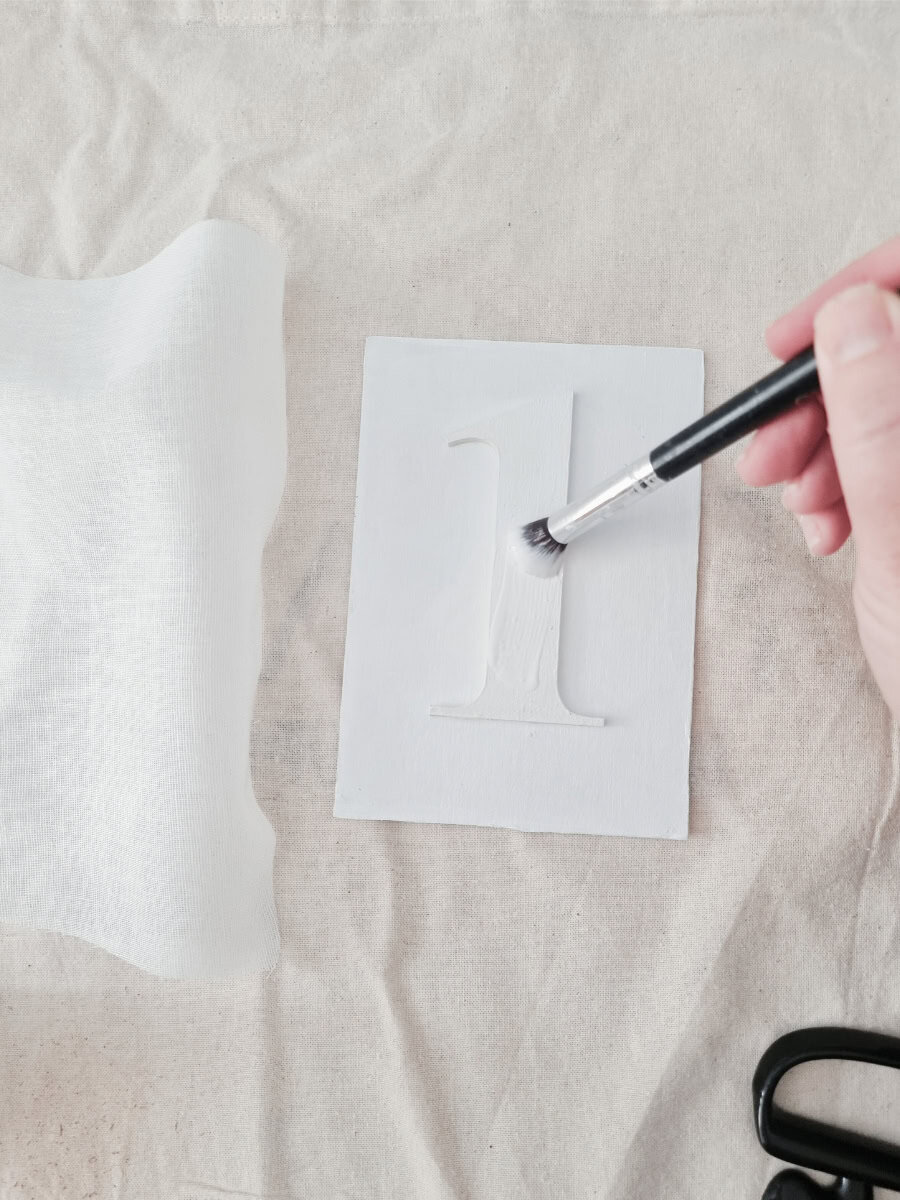
3. Paint
Give the boards and numbers a quick coat of white acrylic to keep the linen looking fresh and help the embossed edge read crisply. Let everything dry fully. I do paint/glue day one, fabric day two. You could paint after gluing, but I found it easier to do first, no paint blobs in the edging of the numbers.
4. Attach the number
Lightly mark centre guides on the back of the board. On the front, glue the number with tacky glue, centre it by eye, and weight it flat until set. Make sure you glue evenly and get the edges for a clean look.
5. Pre-cut your linen (two pieces per board)
Cut the front and back pieces before gluing so you can work quickly: each about 10–12 mm larger than the board on all sides. Keep the weave straight to the board edges.
6. Glue the front
Brush on a thin, even coat of tacky glue or Mod Podge across the entire face, right up to the edges and over the number. You want glossy-wet coverage, not puddles—too much glue can show through.
7. Lay the linen
Place the front piece and smooth from the centre outward with your fingers to chase out air. Then use a brayer/scraper for a flat, bubble-free surface. Keep gentle tension so the weave stays straight.
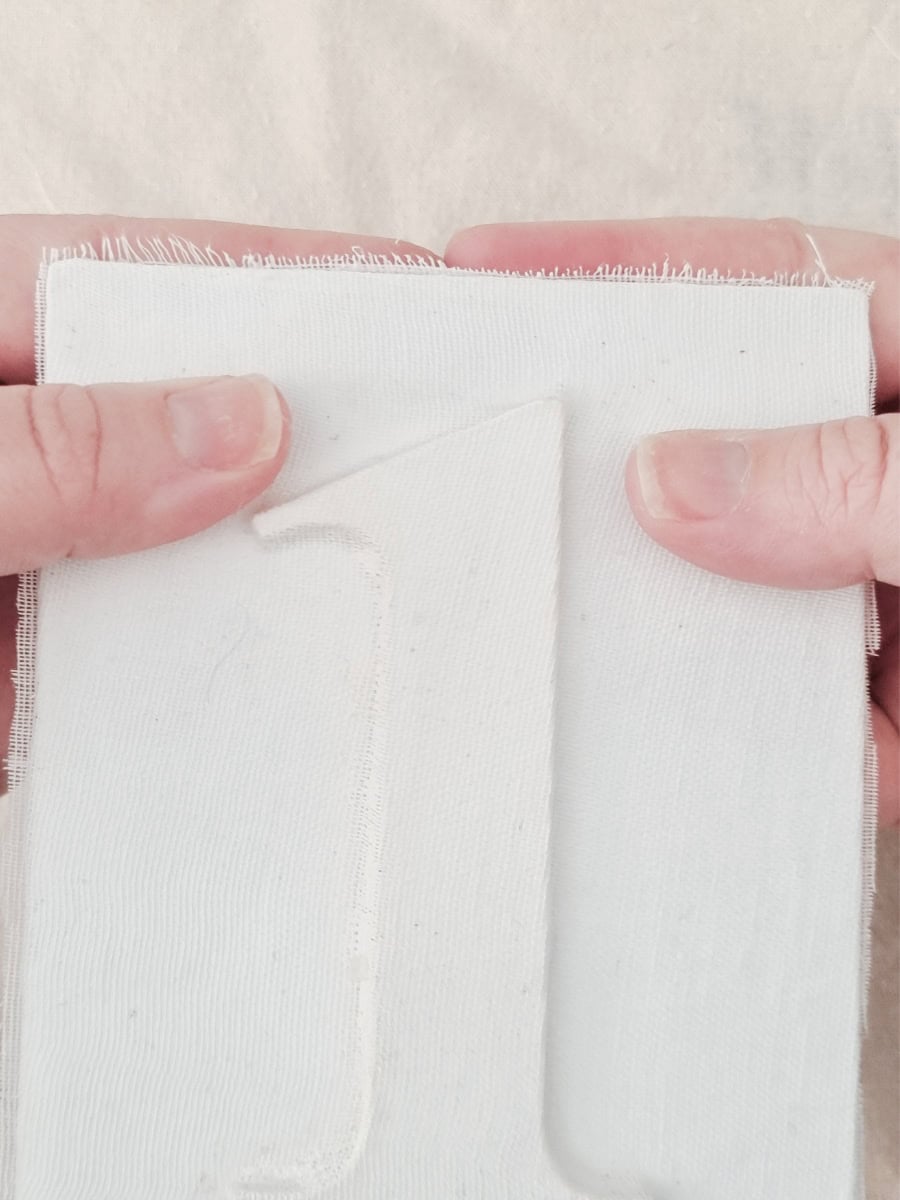
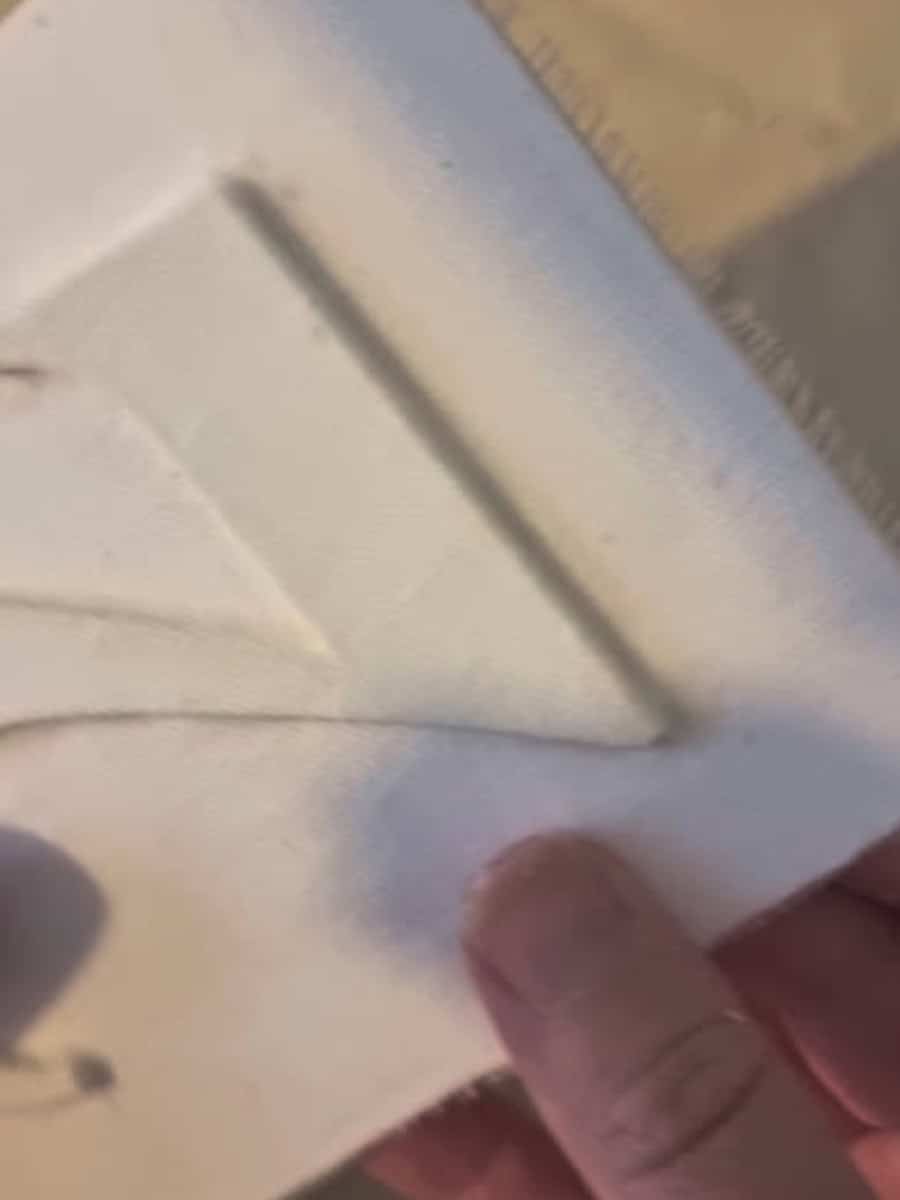
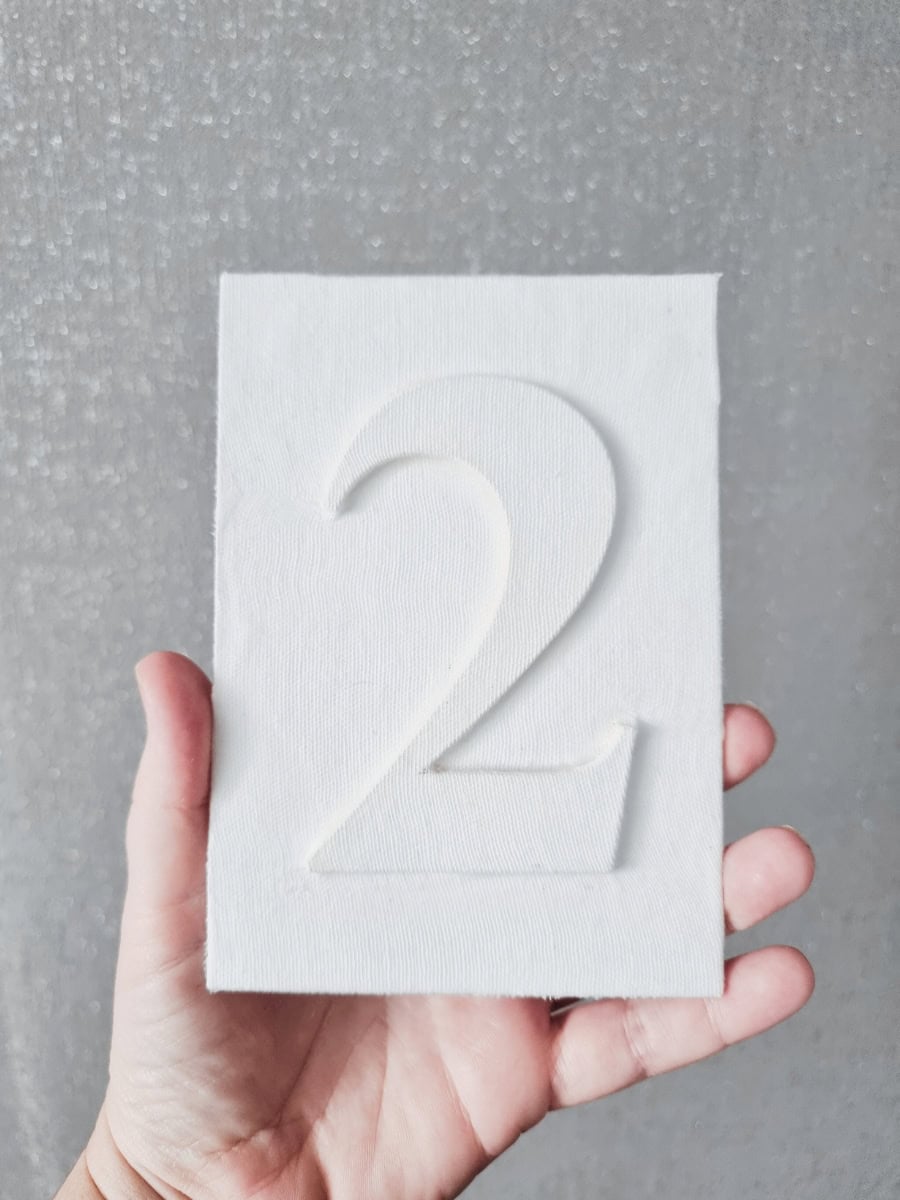
8. Reveal the emboss
First trace the numeral lightly with your fingertip to “find” the edges. Use your nail for a soft crease, then switch to an embossing stylus (ball tool) for definition. Work slowly along the strokes, pressing the fabric right down to the board at the numeral’s edge. Support the opposite side with your other hand so you don’t pull the fabric off the glue—especially when you press one side of a curve. Go around 2–3 times for a crisp profile, including any inner counters (0, 6, 8).
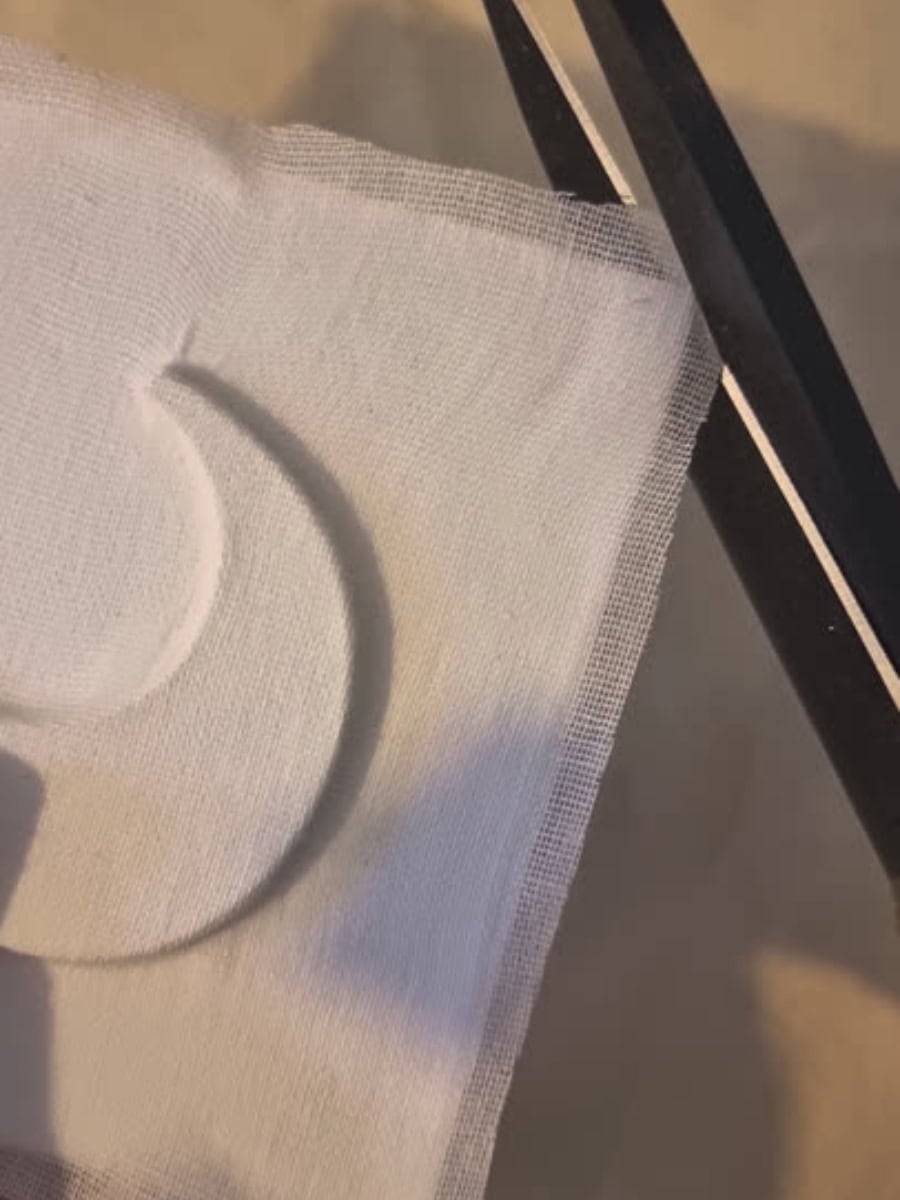
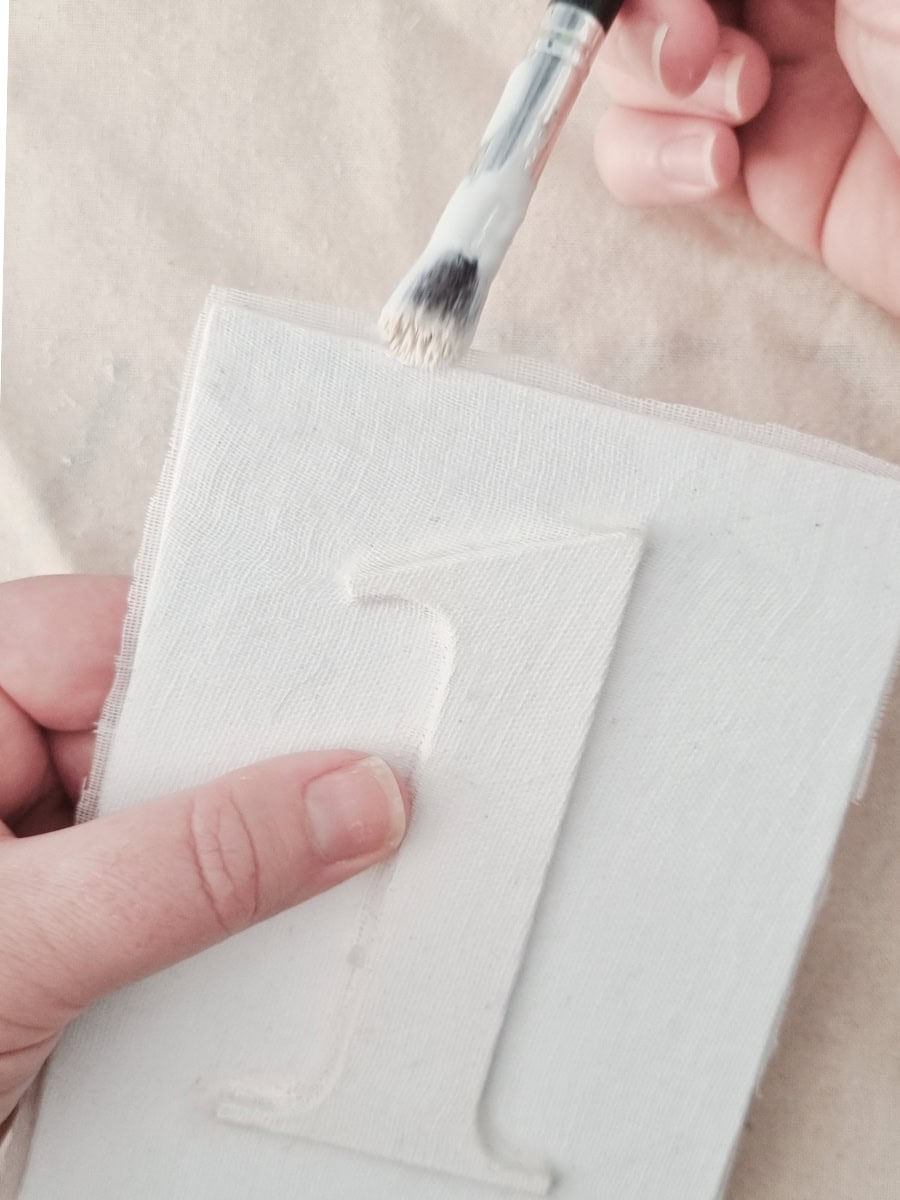
9. Trim for the wrap
Flip the board and trim the fabric to leave a 4–5 mm border. Miter corners at 45° (leave the tiniest bridge of fabric so you don’t expose the board). Pull away any loose threads now.
10. Wrap the edges
Glue the borders and fold one side at a time, keeping tension so the fabric stays tight and smooth. Tidy frays with a small dab of glue. Press flat under a book or use mini clamps while it grabs.
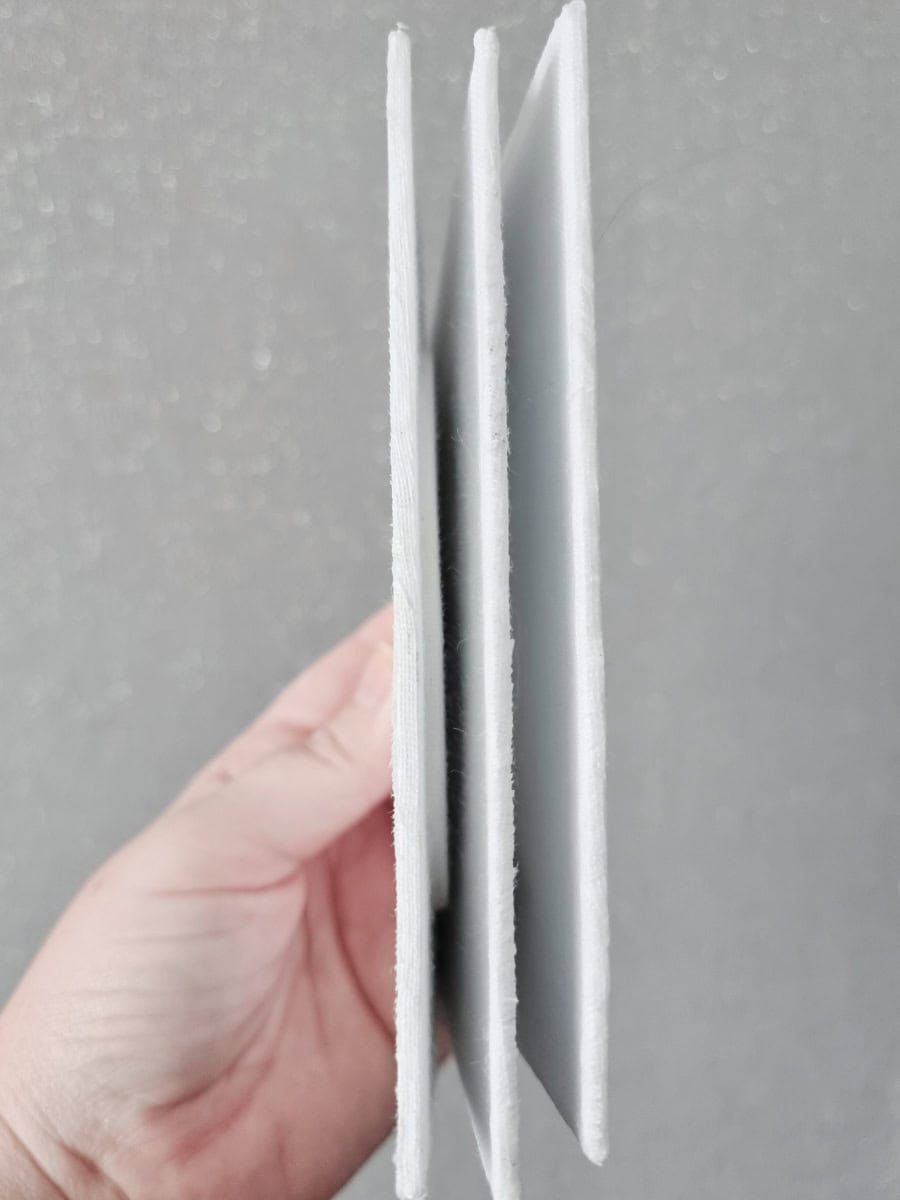
11. Finish the back (single-sided)
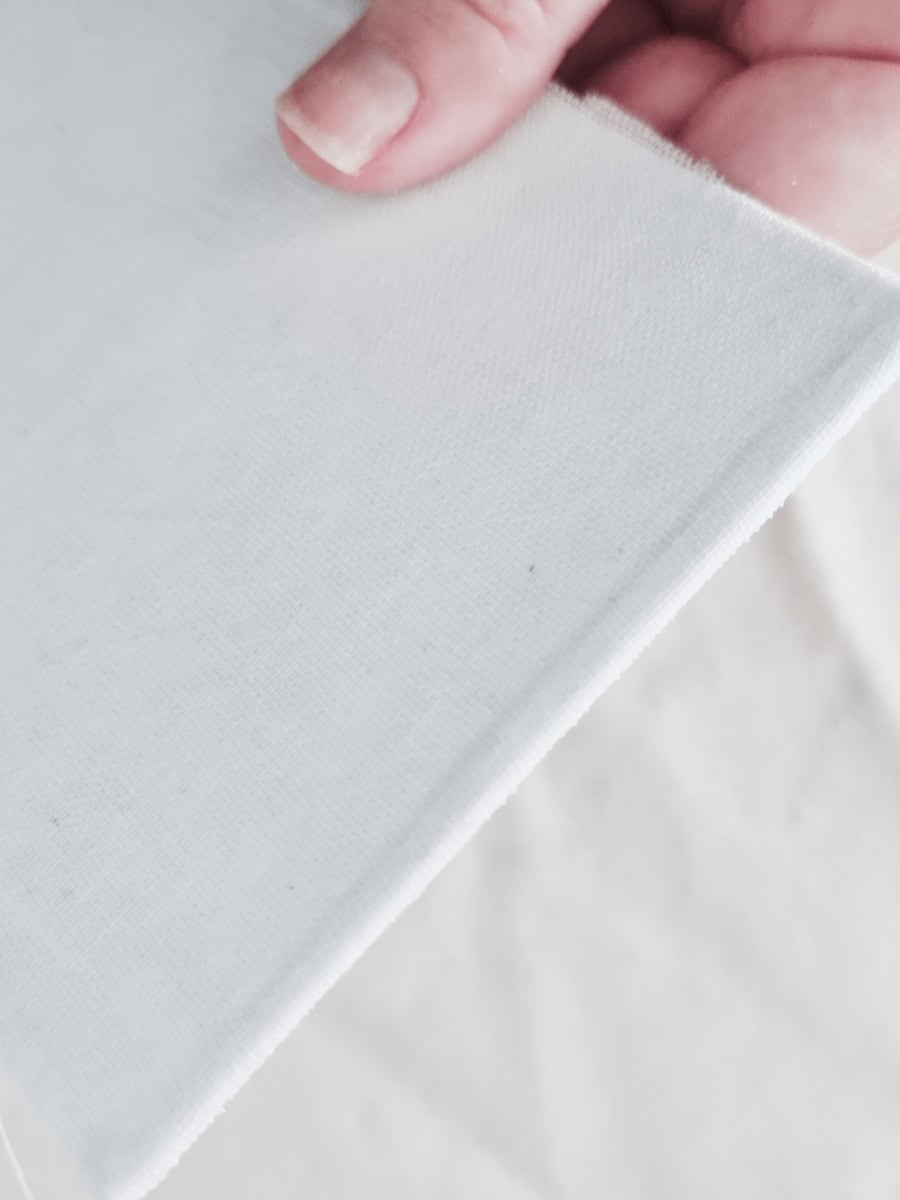
Brush a thin coat of glue on the back and lay the second linen piece. Brush from the centre out. Trim so there’s only 1.5–2 mm of fabric to fold—this makes the join sit on the edge rather than rolling onto the front. For a seamless look, gently pull 2–3 threads off the cut edge to feather it before gluing down. Keep pressing as it sets; once dry, the join disappears and reads like one piece of fabric.
If you want numbers on both sides, repeat the number and fabric steps on the reverse instead of the single-sided back.
12. Dry flat and display
Sandwich the board between clean sheets (baking paper works) and weight with books until fully dry. I paint and glue day one, then do the fabric on day two for the cleanest results. Slot into wooden block stands—a 3 mm slot fits a 2 mm greyboard wrapped in linen perfectly (this is why I chose this thickness). Easels or plate stands also work for extra height.
My quick tips: Keep glue even (enough, but not too much), take your time pressing around the numeral, and finish with the ball tool for those sharp, professional edges. If a section drags while you’re defining a curve, hold the opposite side with your other hand and go over it in a few light passes rather than one hard press.
Troubleshooting & Pro Tips
- Soft/blurred number edge: Press with a ball-tipped stylus, not a fingernail; add a touch more glue right at the edge; tighter-weave linen helps.
- Bleed-through/stains: Too much glue. Use a thin, even coat and work from centre out.
- Bubbles/wrinkles: Lay linen from the centre and brayer outward; sheet adhesive under the fabric can also help.
- Fabric shifting off-centre: Lightly mark centre lines on the back of the board; align the weave with the board edge before pressing.
- Lumpy wraps on the back: Trim to 1.5–2 mm; fray-pull 2–3 threads off the cut edge before gluing so it sits flush and disappears.
Styling & Variations
- Keep it tonal with chalk-white linen for minimalist venues, or switch to charcoal/stone for moody palettes.
- Add a fine border stitch with fabric paint pen, or swap numerals for table names (cut letters instead of numbers).
- Create a coordinating suite: matching linen menus, place cards, and a small A5 bar sign using the same method.
FAQs
Do I need a Cricut?
No. Pre-cut wood numbers are inexpensive and neat. You can also hand-cut from card—just allow more time.
Will an iron work instead of a press?
You don’t need heat for this project. Pressure + glue does the work. If you’re pre-pressing creases, a quick pass with a dry iron on low is fine.
Can I use cotton instead of linen?
Yes. Cotton works well; linen’s looser weave embosses a little more dramatically.
Are they durable for outdoor use?
Keep them dry. If you expect moisture, add a light coat of matte sealer to painted edges before fabric, and display under cover.