
Planning a wedding website might seem simple at first, but once you start building it, it’s easy to wonder what information guests actually need to see.
From ceremony details and travel information to FAQs and RSVPs, your website quickly becomes one of the most important tools for keeping guests informed.
A well planned wedding website can answer common questions, help guests organize their travel, and make your invitations much simpler.
Instead of sending multiple inserts or answering the same messages repeatedly, guests can visit your website whenever they need information.
This wedding website checklist will walk you through everything to consider before sharing your site with guests, along with the key details most couples include.
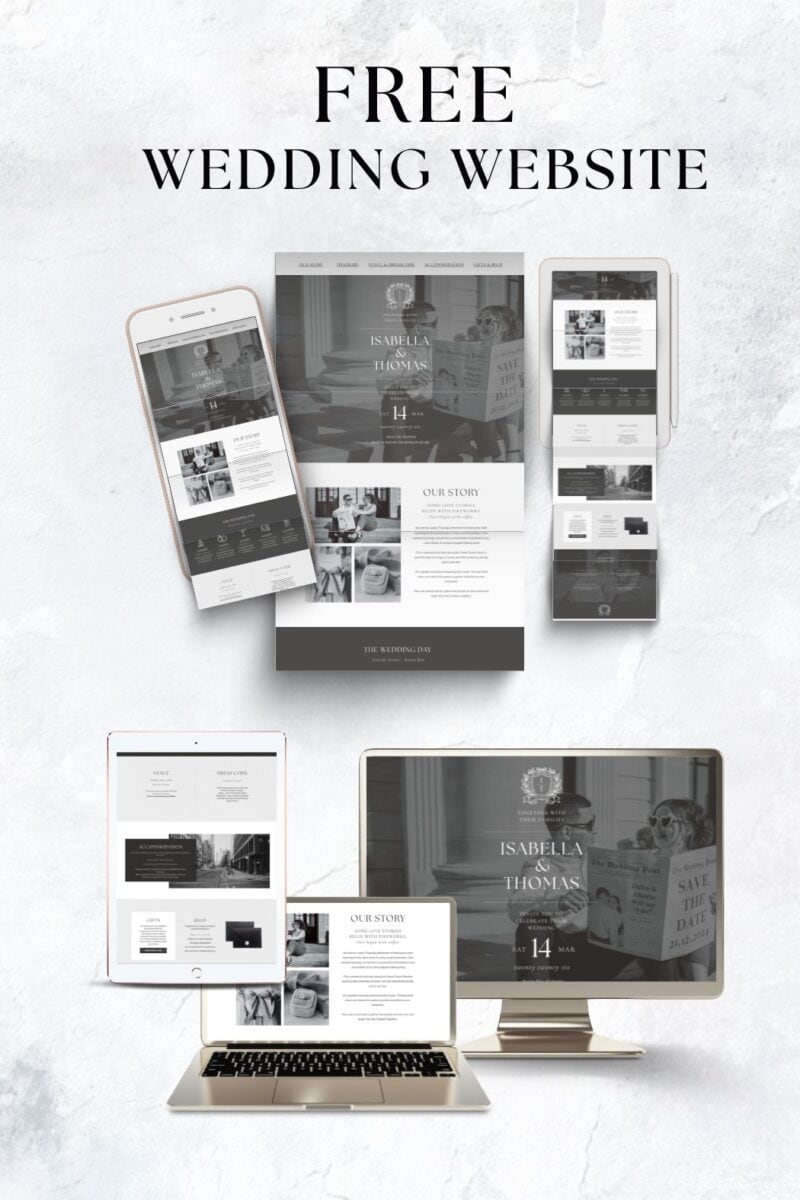
You can also download the free checklist to use as you build your wedding website step by step.
Why Your Wedding Website Matters More Than You Think
A wedding website is more than a place to share your date and venue. It acts as the central hub for your entire celebration, giving guests one place to find everything they need to know before the big day.
Instead of answering the same questions repeatedly, your website provides clear information about the ceremony, reception, travel plans, and important details like dress code or RSVP deadlines. Guests can check the site whenever they need, which saves time and avoids confusion.
It also makes updating information much easier. If plans change or new details need to be added, you can simply update the website rather than contacting every guest individually.
For guests traveling to your wedding, the website becomes especially helpful. You can share hotel recommendations, transport options, local tips, and your wedding weekend schedule so everyone can plan ahead.
Because so much information lives on your website, your invitations can stay simple and elegant. Instead of including multiple inserts with directions, accommodation lists, and event details, you can simply guide guests to the website for everything they need.
The key is knowing what information guests actually expect to find. That’s where a clear checklist helps.
Your Wedding Website Planning Checklist
Not every wedding website needs to include every possible section. Some celebrations are simple and local, while others involve travel, multiple events, or large guest lists that require more information.
The goal of your wedding website is not to fill it with content. It is to make sure guests can quickly find the answers they are most likely to look for. If your website clearly explains the key details, guests will feel more confident planning their day and you will spend far less time answering the same questions.
Use the checklist below as a guide to help you decide what to include, what might be helpful for your guests, and what you can skip.
Step 1: Choose Your Wedding Website Platform
The first step is deciding where your wedding website will live. Most couples use dedicated wedding website platforms because they make it easy to add details, collect RSVPs, and update information as plans evolve.
When choosing your platform, think about how simple it will be for guests to use and how easy it will be for you to manage updates throughout the planning process.
Checklist
• Decide which wedding website platform you will use: (such as Zola, WithJoy, The Knot, or a custom site builder like Squarespace or free Canva website)
• Choose a clear and simple website URL guests can easily remember
• Pick a design that fits the style of your wedding or matches your invitations
• Decide whether the site will be public or password protected
Quick Tip
Keep your website address short and easy to type. Many couples use a simple format such as names + wedding year so guests can quickly find the site if they need to revisit it later.
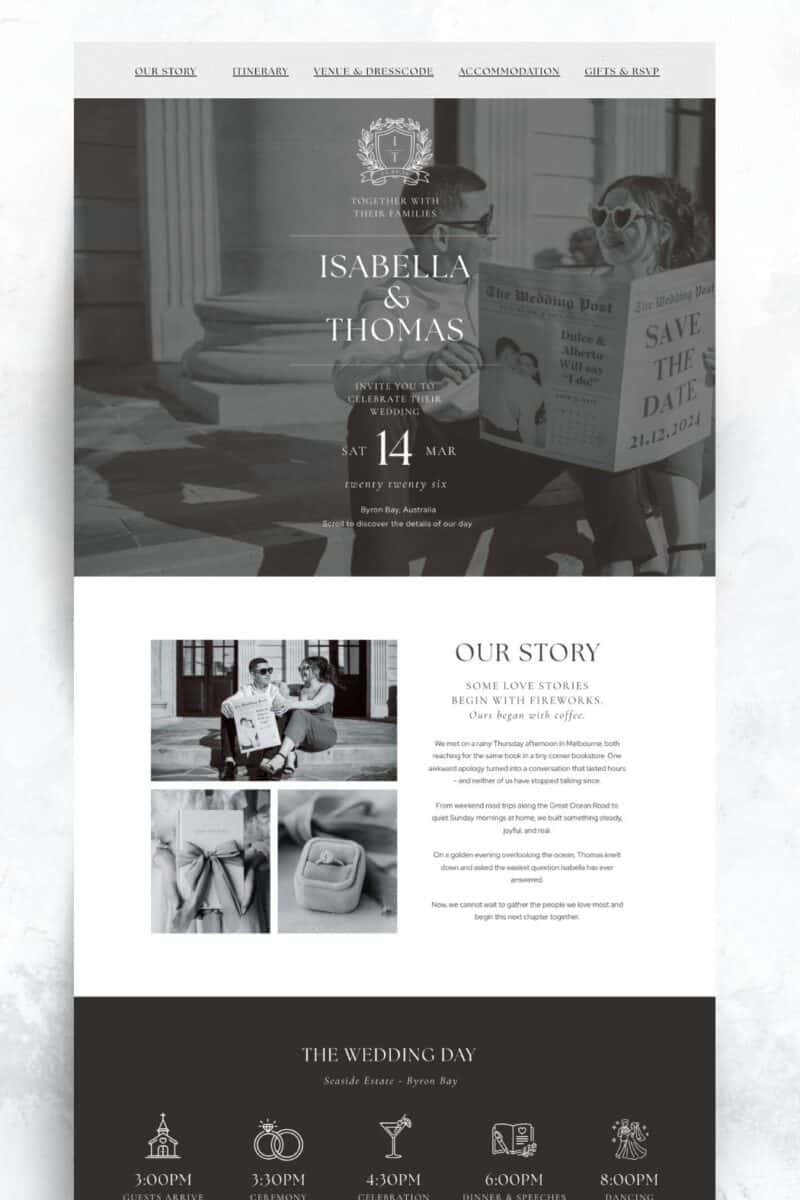
Step 2: Add Your Core Wedding Details
Your wedding website should clearly explain the essential details guests need to attend your celebration. These are the practical pieces of information people will look for first when they visit your site.
Think of this section as the foundation of your website. If guests can quickly confirm where they need to be, when they should arrive, and what to expect, the rest of your website becomes much easier to navigate.
Checklist
• Add your wedding date so guests can easily confirm the day
• Include the full ceremony location with the venue name and address
• Add the reception location if it is different from the ceremony venue
• Clearly state the ceremony start time
• Provide a map link or simple directions to the venue
• Explain the dress code so guests know how formal the event will be
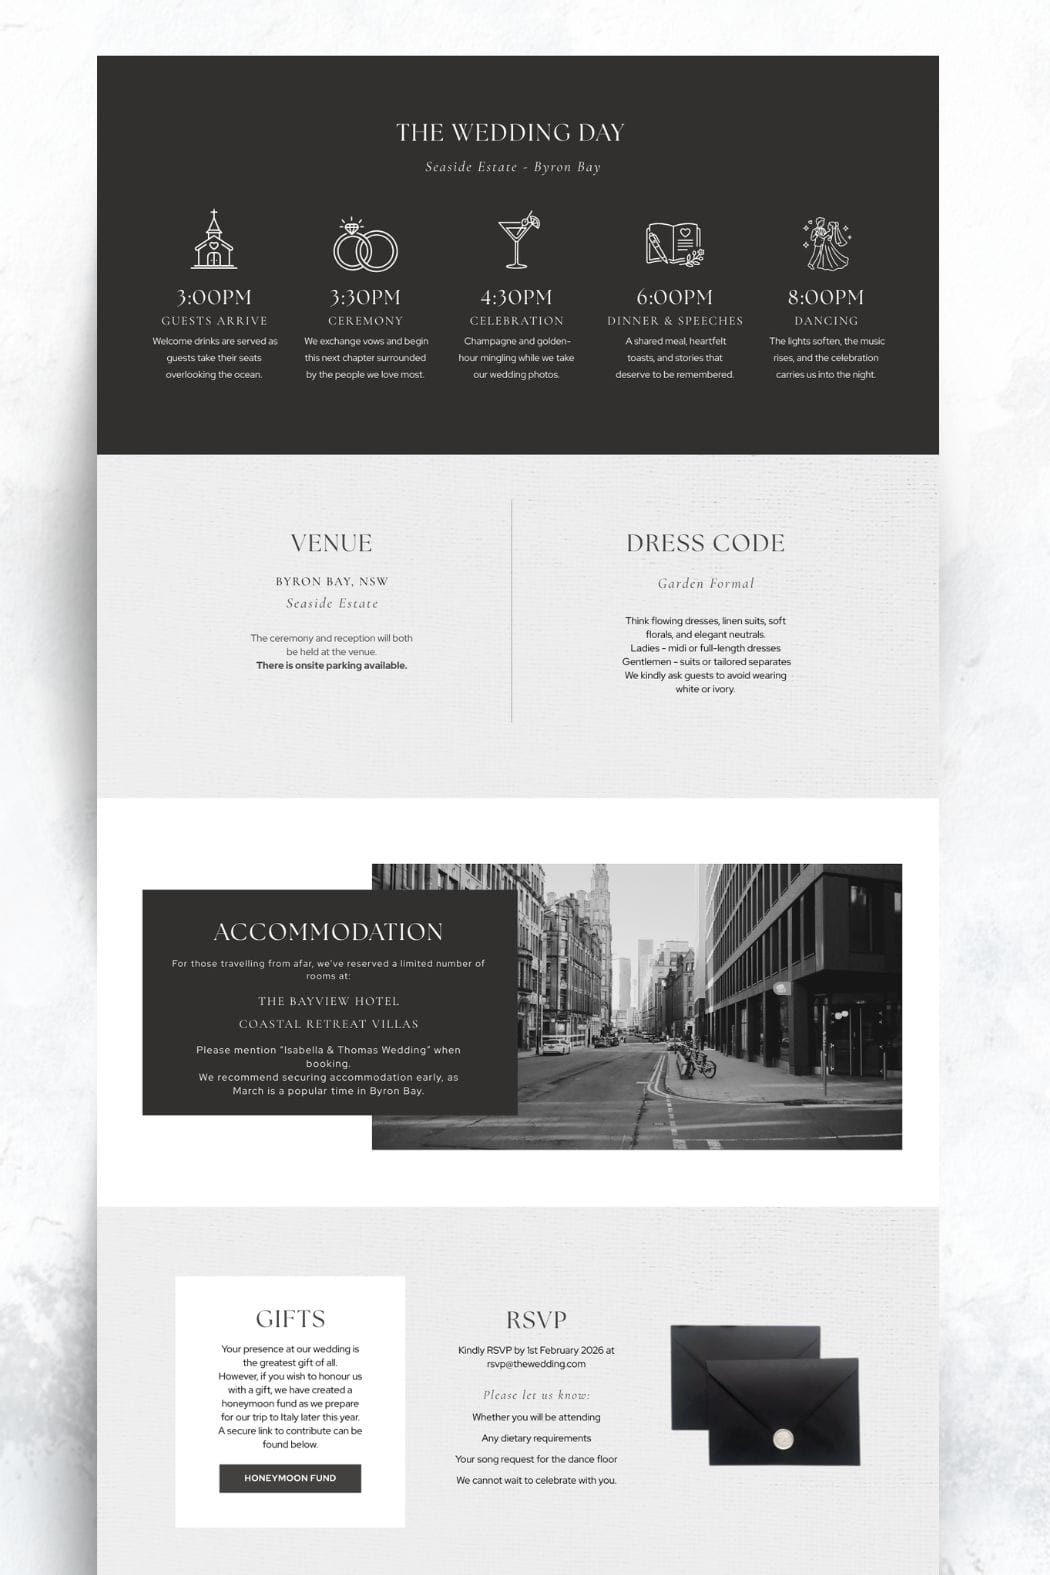
• Share a basic timeline such as ceremony, cocktail hour, and dinner
Quick Tip
Clarity is more important than detail here. Guests should be able to glance at your website and immediately understand when and where everything is happening.
Step 3: Write Your Welcome & About Story
Most wedding websites include a short welcome message and a brief story about the couple. While this section is optional, many guests enjoy learning a little more about your relationship and the journey that led to the wedding.
The key is keeping it simple. Guests usually visit your website for practical information, so this section should feel personal without becoming too long.
Checklist
• Write a short welcome message to greet guests when they visit the site
• Share your story or how you met if you would like to include it
• Introduce the wedding party if you want guests to know who will be involved in the day
• Add a photo of the couple to make the page feel more personal
Quick Tip
Keep this section short and easy to read. A few paragraphs or a short timeline is usually enough to give guests a sense of your story without overwhelming them.
Step 4: Build Your FAQ Section
A wedding website FAQ section is one of the most useful parts of the entire site. It answers the practical questions guests are most likely to ask and helps avoid dozens of messages in the weeks leading up to the wedding.
It also improves your website’s usefulness by putting all the small but important details in one place. Guests can quickly scan the questions and find the information they need.
Checklist
• Clarify the dress code if the wording on the invitation might be unclear
• Explain transportation options such as shuttles or taxis
• Provide parking information if guests are driving
• Outline plus-one rules so guests understand their invitation
• Explain your child policy if the wedding is adults-only or limited
• Share ceremony etiquette such as whether it is an unplugged ceremony
• Explain backup weather plans if the ceremony is outdoors
Quick Tip
Most couples only need around 8 to 15 questions in their FAQ section. Too many questions can overwhelm guests and make important information harder to find. Focus on the details guests are most likely to ask about. We have lots of example here: Wedding website FAQs.
Step 5: Set Up RSVPs
Your RSVP section allows guests to confirm their attendance and helps you collect important details for planning the day. Many couples now use online RSVPs through their wedding website because it makes tracking responses much easier.
Make sure the process is simple for guests and test it before sharing the website.
Checklist
• Decide if guests will RSVP directly through the website
• Add a clear RSVP deadline so guests know when to respond
• Allow guests to select meal choices if your catering requires it
• Include a space for dietary requirements or allergies
• Test the RSVP form to make sure responses are recorded correctly
Quick Tip
Always test the RSVP process yourself before sharing the website. Submit a sample response and check that the information appears correctly in your guest list or dashboard. We have a free google RSVP form here.
Step 6: Add Travel & Accommodation Information
If guests are traveling for your wedding, this section can make their planning much easier. Even for local weddings, providing a few suggestions can help guests organize their stay and transportation.
Clear travel information also reduces last minute questions from guests who are unfamiliar with the area.
Checklist
• List recommended hotels near the venue
• Include details of any room blocks you have reserved
• Share the closest airports or train stations for out-of-town guests
• Explain transportation options such as taxis, shuttles, or parking
• Suggest a few nearby attractions or activities for guests staying longer
Quick Tip
Include booking links whenever possible. Guests appreciate being able to quickly click through and reserve accommodation without needing to search for it themselves.
Step 7: Link Your Wedding Registry
Your wedding website is the easiest place to share your registry with guests. Instead of including registry details directly on invitations, the website allows you to list everything in one convenient place.
Keep this section simple and easy to navigate so guests can quickly find your gift preferences if they choose to give one.
Checklist
• Add links to your wedding registry or registries
• Clearly label each registry so guests know where the link leads
• Mention if gifts are optional or if guests should not feel obligated
• Include a honeymoon fund or cash fund if you are using one
Quick Tip
Avoid writing long explanations about gifts. A short note thanking guests for celebrating with you and mentioning that gifts are optional keeps the tone polite and comfortable.
Step 8: Add Extra Helpful Guest Information
Some weddings include additional details that guests will need to plan ahead. These can vary depending on the type of wedding, location, and schedule of events.
Adding this information early helps guests feel more prepared and reduces last-minute questions.
Checklist
• Share details of any wedding weekend events such as a welcome party or rehearsal dinner
• Include shuttle schedules if transportation is being provided
• Mention childcare arrangements if you are offering them
• Add accessibility information if guests may need assistance
• Provide a contact person for questions if guests should not contact the couple directly
Quick Tip
Think about the questions guests might ask once invitations are sent. If the answer could help multiple people, it is usually worth adding to the website.
Step 9: Review Your Website Before Sharing
Before sending your website to guests, take time to review everything carefully. Small mistakes or missing details can create confusion once guests start using the site for information.
Checking your website thoroughly helps ensure guests can easily find what they need without needing to follow up with questions.
Checklist
• Check spelling and confirm all wedding details are correct
• Test every link on the site to make sure it works
• Submit a test RSVP to confirm responses are recorded correctly
• View the website on mobile to ensure it is easy to read
• Ask a friend or family member to review the site and spot anything unclear
Quick Tip
Look at the website from a guest’s perspective. Someone who has never seen your plans before should be able to quickly understand when and where everything is happening.
Step 10: Update Your Website After Invitations Go Out
Your wedding website should stay updated throughout the planning process. Once invitations are sent and guests begin visiting the site, you may need to add extra details or clarify information.
Keeping the website current helps guests stay informed as the wedding approaches.
Checklist
• Add final timeline details as plans become more concrete
• Update accommodation information if hotel blocks begin filling up
• Share shuttle schedules or transportation updates
• Add reminders about RSVP deadlines
• Post any important last-minute announcements or changes
Quick Tip
Many couples forget to update their website after invitations are sent. Treat it as a living resource that can be adjusted whenever new details arise.
Common Wedding Website Mistakes to Avoid
Wedding websites are designed to make planning easier for both you and your guests. However, a few common mistakes can make the site confusing or harder for guests to use.
The goal is to keep your website clear, practical, and easy to navigate.
Adding too much information
It can be tempting to include every detail about your wedding, but too much information can overwhelm guests. Focus on the details guests actually need to attend and enjoy the day.
Forgetting to include the RSVP deadline
Guests need to know exactly when they must respond. Without a clear deadline, responses may arrive late and make planning more difficult.
Not checking the mobile version of the site
Many guests will view your website on their phones. Make sure the layout, text, and links work properly on smaller screens.
Writing extremely long stories
Your love story can be a nice personal touch, but long sections of text are often skipped by guests. A short welcome message and a brief story is usually enough.
WE have a full post on common wedding website mistakes couples make.
More blogs you will love!
- How to Chase Wedding RSVPs Politely (Without Feeling Awkward)

- Wedding RSVP Questions You Should Ask Guests

- The Simple Wedding RSVP Tracker Every Couple Needs
- How to Track Wedding RSVPs Without Losing Your Mind

- Common Wedding Website Mistakes Couples Make (And How to Avoid Them)

- Wedding Website Checklist: Everything to Include Before You Launch Your Site

- Wedding Website FAQ Examples Guests Actually Need

- How to Create a Digital Save the Date Evite (With Our Free Canva Template!)

- 10 Things Every Modern Wedding Website Needs