
Your wedding website should do more than display information. It should collect RSVPs clearly and automatically.
If you are using a Canva wedding website, you may have the option to use a built-in Canva form. However, many couples prefer using Google Forms because it offers more flexibility and automatic spreadsheet tracking.
In this guide, I will show you exactly how to collect wedding RSVPs using Google Forms, how to link it properly to your Canva website and how to track responses automatically in Google Sheets.
You will also get access to a free editable Google Form RSVP template so you can duplicate it, customise it and connect it to your own spreadsheet in minutes.
Google Forms For Website RSVP
If you are building your wedding website in Canva, Google Forms is the simplest and most reliable way to collect RSVPs.
It also links to a spreadsheet that you can connect to other sheets, set automations with email reminders and export the data for future planning.
Why Google Forms Works Well
Google Forms is completely free to use. There are no submission limits for normal wedding guest numbers and no upgrade required.
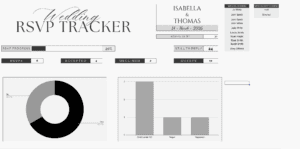
Every response automatically feeds into Google Sheets. This means you instantly get a live spreadsheet showing who is attending, who has declined, guest counts and dietary requirements. You do not need to manually transfer responses.
It is easy to customise. You can add required questions, optional song requests, meal selections and plus-one clarification in minutes.
It is mobile-friendly by default. Most guests will open your RSVP link on their phone, and Google Forms works cleanly on mobile without extra setup.
No coding is required. You create the form, copy the link and connect it to your website.
It is important to note that Canva websites do not function like full website builders with advanced form integrations. While Canva allows links and some embed options, it does not support robust native form embeds in the way platforms like WordPress or Squarespace do.
For that reason, the most reliable setup is to create your RSVP in Google Forms and link to it from a clear RSVP button on your Canva website rather than trying to embed the form directly.
Step 1: Create Your Google Form
Go to Google Forms and start a blank form. You do not need any special account beyond a standard Google account.
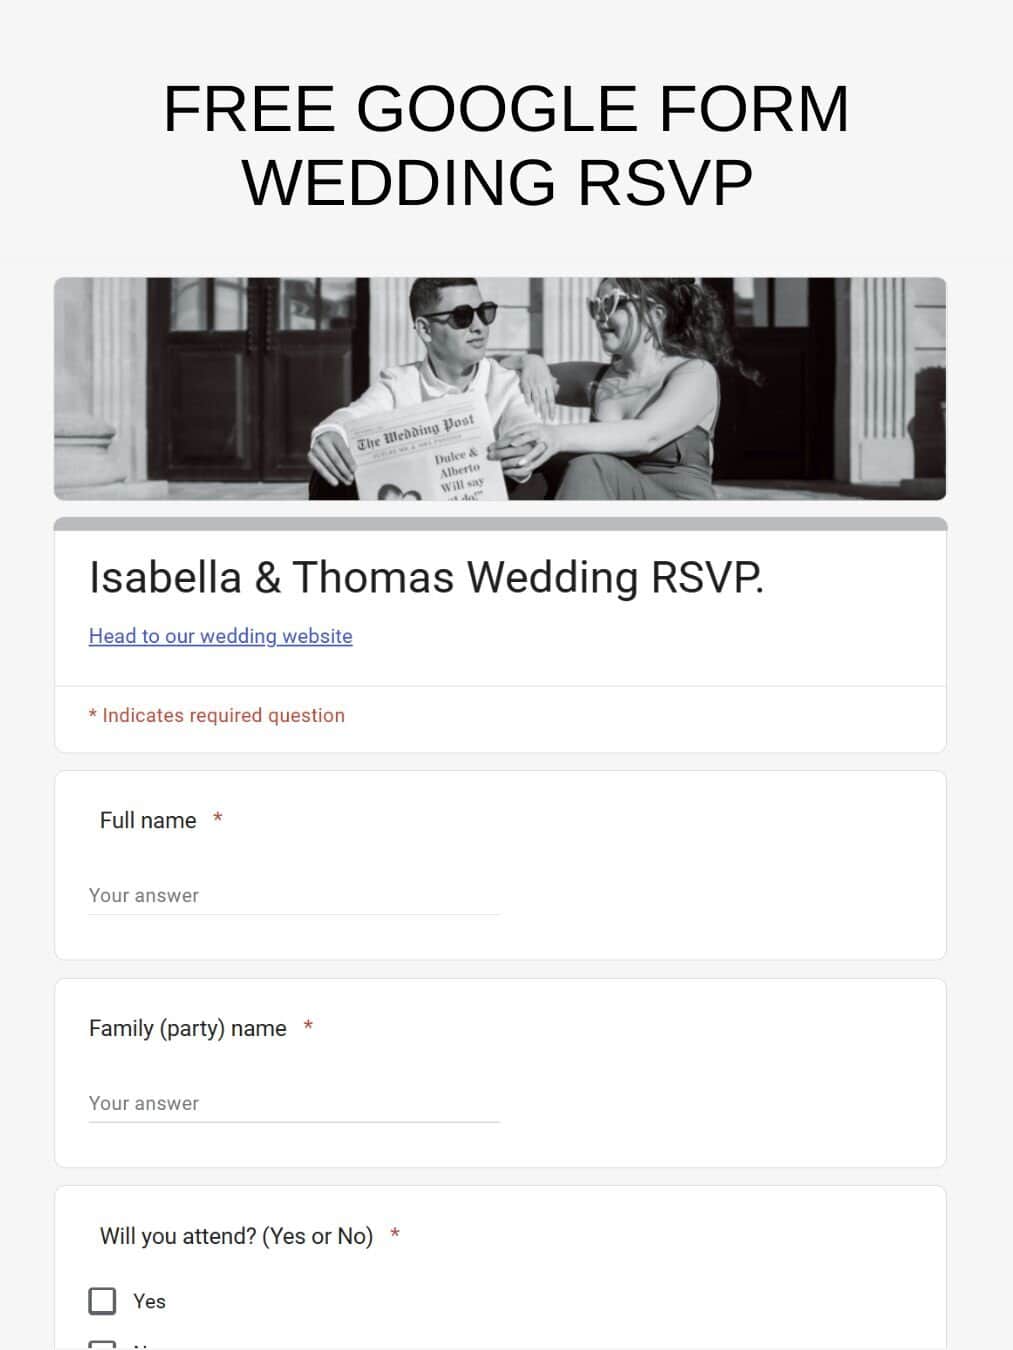
Title the form clearly so guests immediately recognise it, for example: Smith & Jones Wedding RSVP.
Add the essential fields only:
- Full name
- Will you attend? (Yes or No)
- Number of guests attending
- Dietary requirements
- Optional song request
Mark the key questions as required so you do not receive incomplete responses.
Keep the form short and focused. The longer the form, the lower the completion rate. Your goal is to collect clear attendance information quickly, not create a survey.
Step 2: Adjust Your Form Settings
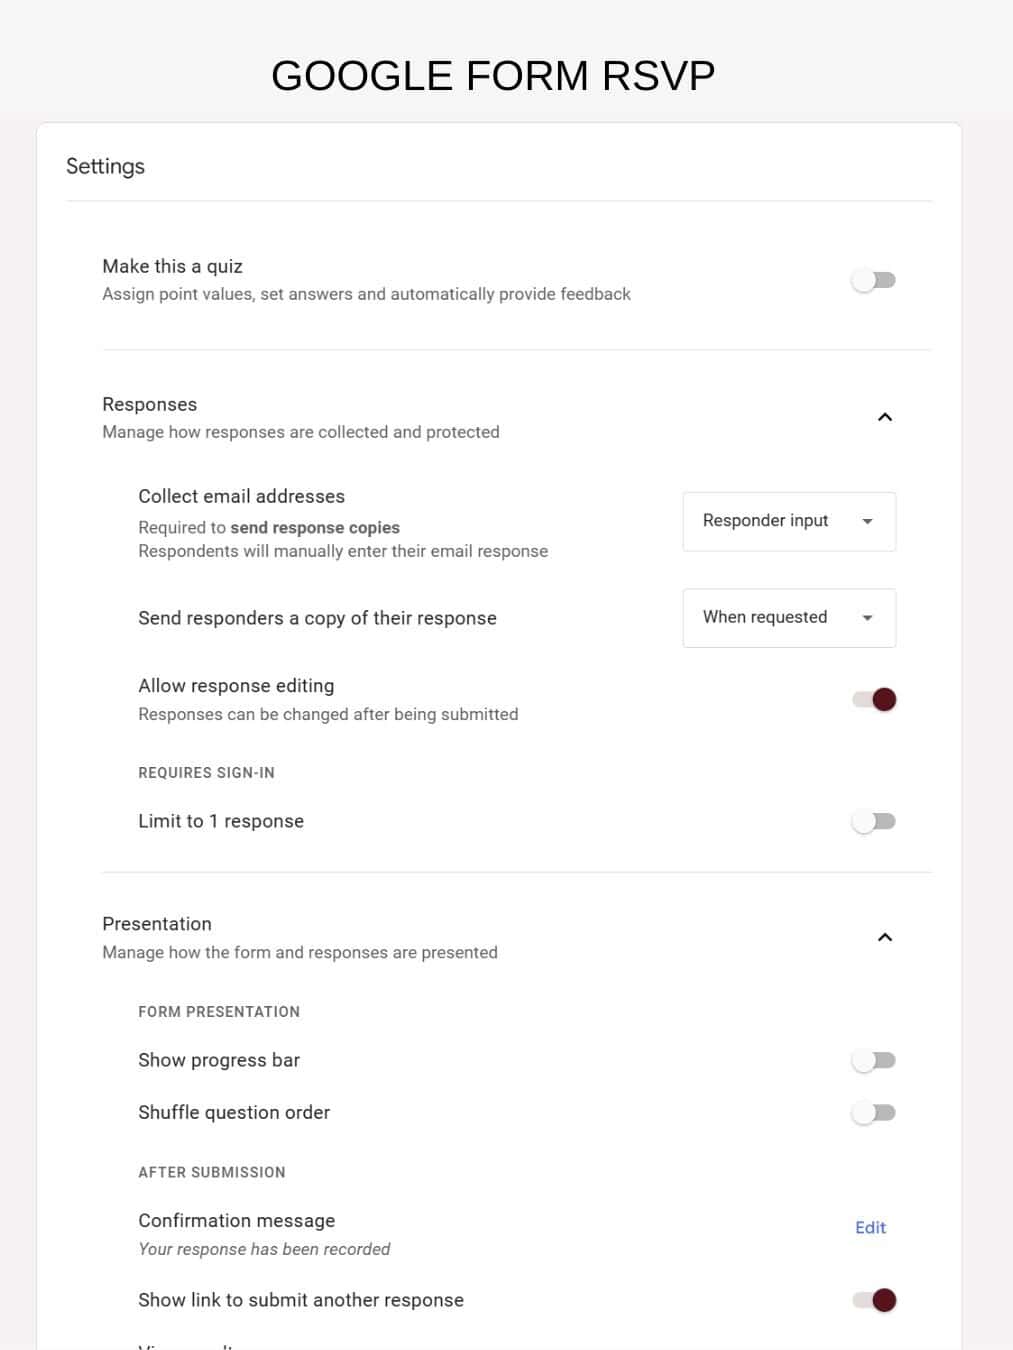
Before sharing the form, review the settings.
Click the settings icon in Google Forms and decide whether to turn on “Collect email addresses.” This is useful if you want a direct contact method or need to follow up with guests. If you are already inviting named guests individually, it may not be essential.
You can also enable response receipts so guests receive confirmation that their RSVP was submitted.
Set a clear confirmation message. For example: Thank you for your response. We can’t wait to celebrate with you. This reassures guests that their submission was successful.
Next, link the form to Google Sheets. In the Responses tab, click the green Sheets icon to automatically generate a spreadsheet. Every RSVP submission will feed directly into this sheet in real time.
This spreadsheet allows you to track acceptances and declines, total guest numbers and dietary requirements without manual data entry. It becomes your live attendance tracker.
Step 3: Add the RSVP Link to Your Canva Website
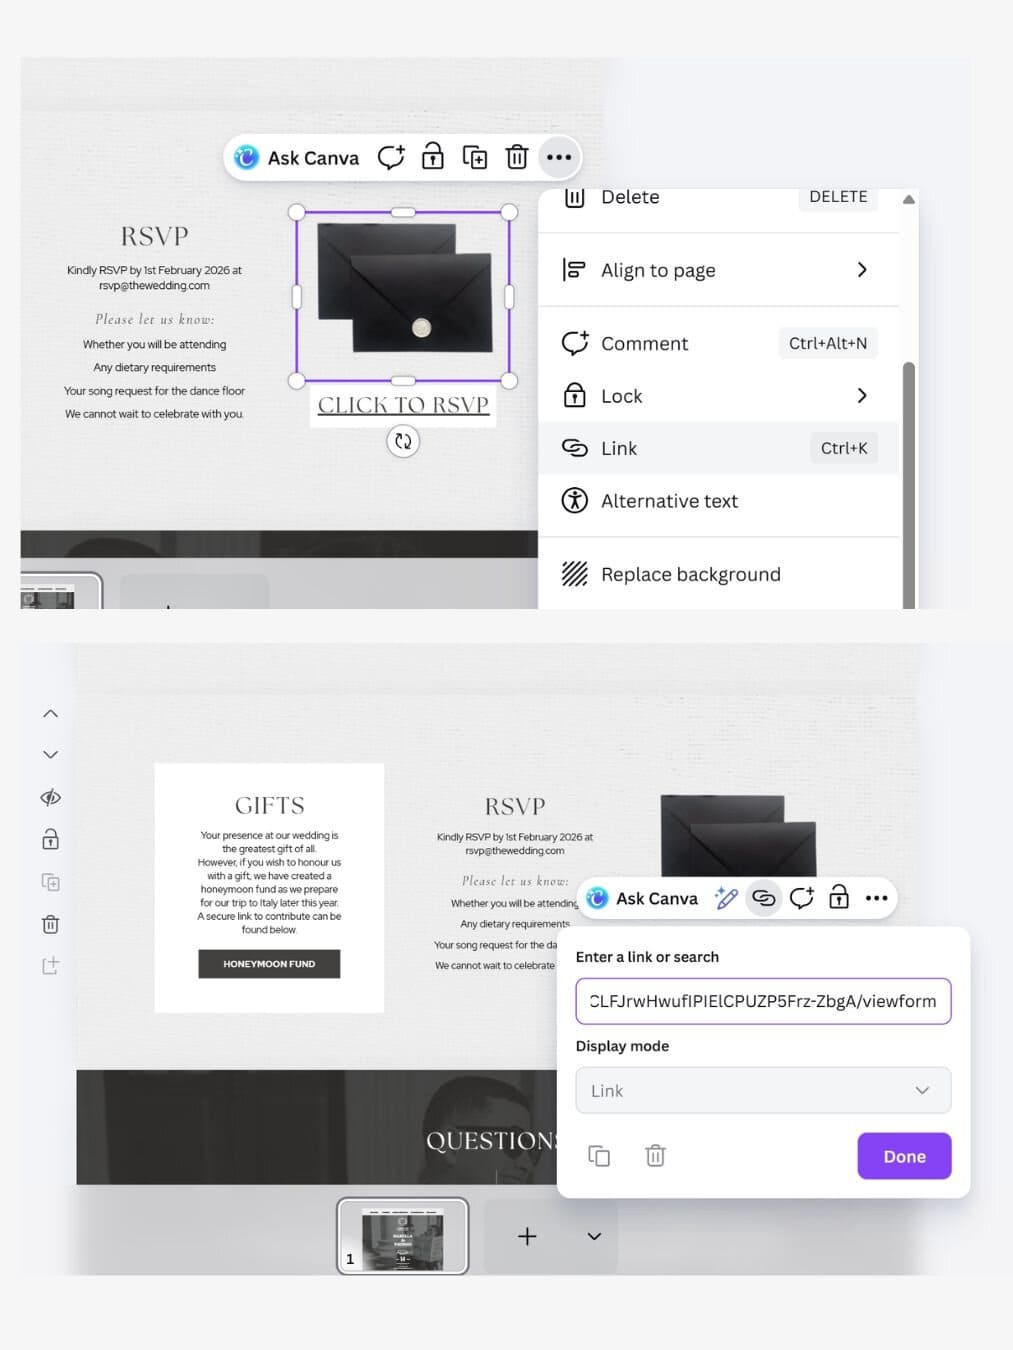
Once your Google Form is ready, you need to connect it to your Canva wedding website.
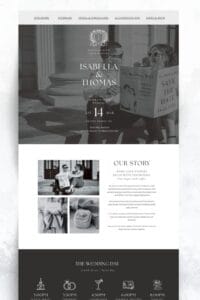
If you are using our free website template then we have 2 RSVP pages, keep the one with the link option and delete the other.
I suggest you link it to the letter image and also have clear click here to RSVP.
To add your RSVP link:
- Copy the Google Form link
- Open your Canva wedding website
- Highlight your RSVP button or RSVP text
- Click the link icon
- Paste the Google Form URL
- Publish or republish your site
When guests click the RSVP button, the form will open in a new tab. This is normal and expected behaviour. It keeps your Canva website clean while allowing the form to function properly across devices.
Step 4: Track Your RSVPs
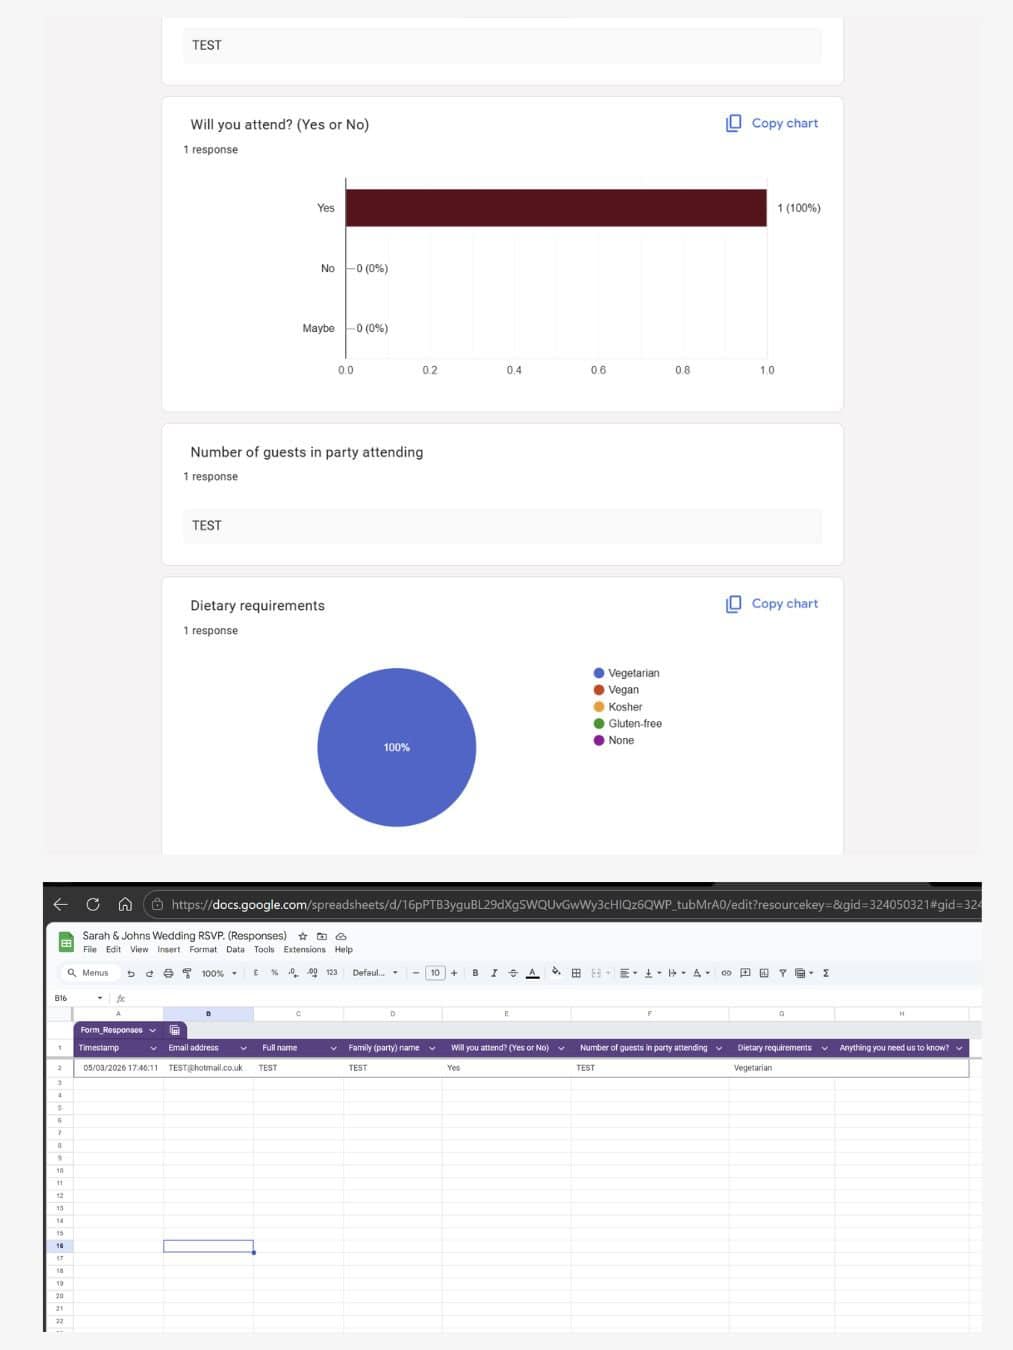
Once your form is connected to Google Sheets, tracking becomes automatic.
Every time a guest submits their RSVP, the response appears instantly in your linked spreadsheet. You will see:
- Total responses submitted
- Who is attending and who has declined
- Number of guests included in each response
- Dietary requirements
- Any optional details such as song requests
You can sort the sheet by attendance status, filter for dietary notes or calculate total guest numbers using simple formulas if needed. For most weddings, the default layout Google generates is already clear and usable.
If you prefer to work offline or share the data with a planner or venue, you can export the spreadsheet as an Excel file at any time. Go to File and select Download, then choose Microsoft Excel.
Head to our full guide and grab a free google sheet with a automatic dashboard to keep track.
Step 5: Style the Form to Match Your Wedding Website
A plain Google Form works perfectly well, but a few small design tweaks can make it feel like part of your wedding website rather than a separate tool.
Start by opening your form and clicking the palette icon at the top. This opens the theme editor where you can adjust the visual style.
Add a header image at the top of the form. This could be:
- A photo of the couple
- A floral graphic that matches your invitations
- The same banner image used on your Canva website
Keeping the same visual elements helps the form feel consistent with the rest of your wedding stationery.
Next, adjust the color settings. Choose a primary color that matches your wedding palette or website theme. Google Forms will automatically apply this color to buttons, highlights, and progress elements.
You can also change the font style within the theme settings. While Google Forms has limited font options, choosing a softer or more elegant style can help it align better with the tone of your wedding website.
Consider adding a short welcome message at the top of the form, for example:
“Please let us know if you can join us for our wedding celebration. Kindly RSVP by June 1st.”
This makes the form feel warmer and more intentional rather than purely functional.
Finally, include any small design touches that improve the guest experience:
- Add a divider or section title if the form contains multiple parts
- Include a short note about plus-ones if needed
- Repeat key details such as the wedding date or location at the top
These small edits take only a few minutes but make the RSVP page feel like a natural extension of your wedding website instead of a generic form.
Pros and Cons of Using Google Forms
Before choosing your RSVP system, it helps to understand what you gain and what you trade off.
Pros
Free
Google Forms does not charge for standard usage. There are no submission limits for typical wedding guest numbers and no hidden upgrade tiers.
Reliable
It is stable, widely used and rarely experiences downtime. Guests are familiar with the interface, which reduces confusion.
Automatic Spreadsheet Tracking
Every response feeds directly into Google Sheets in real time. You instantly have a live attendance tracker without manual data entry.
Easy to Update
You can edit questions, add fields or adjust wording at any time. Changes apply immediately without needing to resend links.
Cons
Opens in a New Tab
Because Canva websites function best with external links rather than embedded forms, your RSVP will open separately from your main website. This is normal, but it is not fully “on-page.”
Design Will Not Fully Match Your Website
While you can adjust basic colours and header images, Google Forms will not perfectly replicate your wedding website design. With our templates you can get a good match or if you have some design skills yourself.
Requires Initial Setup
You need to create the form, configure settings and link it properly. It is simple, but it is not automatic.
For most couples using a Canva wedding website, the reliability and free tracking outweigh the aesthetic limitations.
Alternative RSVP Tools (Brief Overview)
If you prefer something different from Google Forms, there are other options. Just remember that when using a Canva wedding website, you will still typically link out to these tools rather than embedding them directly.
Typeform
Pros:
- Cleaner, more modern design
- Conversational, one-question-at-a-time format
- Feels more premium
Cons:
- Limited free tier
- Most useful features require a paid plan
- Still requires linking from your Canva website
Typeform works well if design is a priority, but it often becomes a paid solution.
Jotform
Pros:
- High level of customisation
- Conditional logic for more complex RSVP flows
- Multiple layout options
Cons:
- Free tier limits submissions
- Branding appears unless upgraded
- More settings to configure
Jotform is powerful, but for a standard wedding RSVP, it may be more than you need.
Airtable
Pros:
- Powerful tracking and filtering
- Advanced sorting and guest management
- Useful for larger or more complex weddings
Cons:
- More complex to set up
- Not necessary for most weddings
- Still requires linking from Canva
Airtable is excellent for advanced organisation, but for most couples, Google Forms connected to Google Sheets is simpler and sufficient.
Zola or WithJoy
These platforms include built-in RSVP systems as part of their wedding website builders.
They are best used if you are building your entire wedding website on their platform. They are not designed to plug directly into a Canva-built site.
In most cases, you would need to send guests to a separate RSVP page hosted on their platform rather than integrating it into your Canva website.
If you are committed to Canva for design flexibility, these platforms may not be the most seamless fit.
Final Recommendation
For most couples using a Canva wedding website, the simplest and most reliable setup is:
Use Google Forms.
Link it clearly from a visible RSVP button on your website.
Track responses automatically in Google Sheets.
This gives you a free, stable system that works on mobile, updates in real time and does not require advanced technical setup.
If you still need help building your site, read the full guide on how to create and customise your Canva wedding website.
And before you publish, make sure your content is complete by reviewing 10 Things Every Wedding Website Needs so your site is clear, organised and genuinely useful for guests.
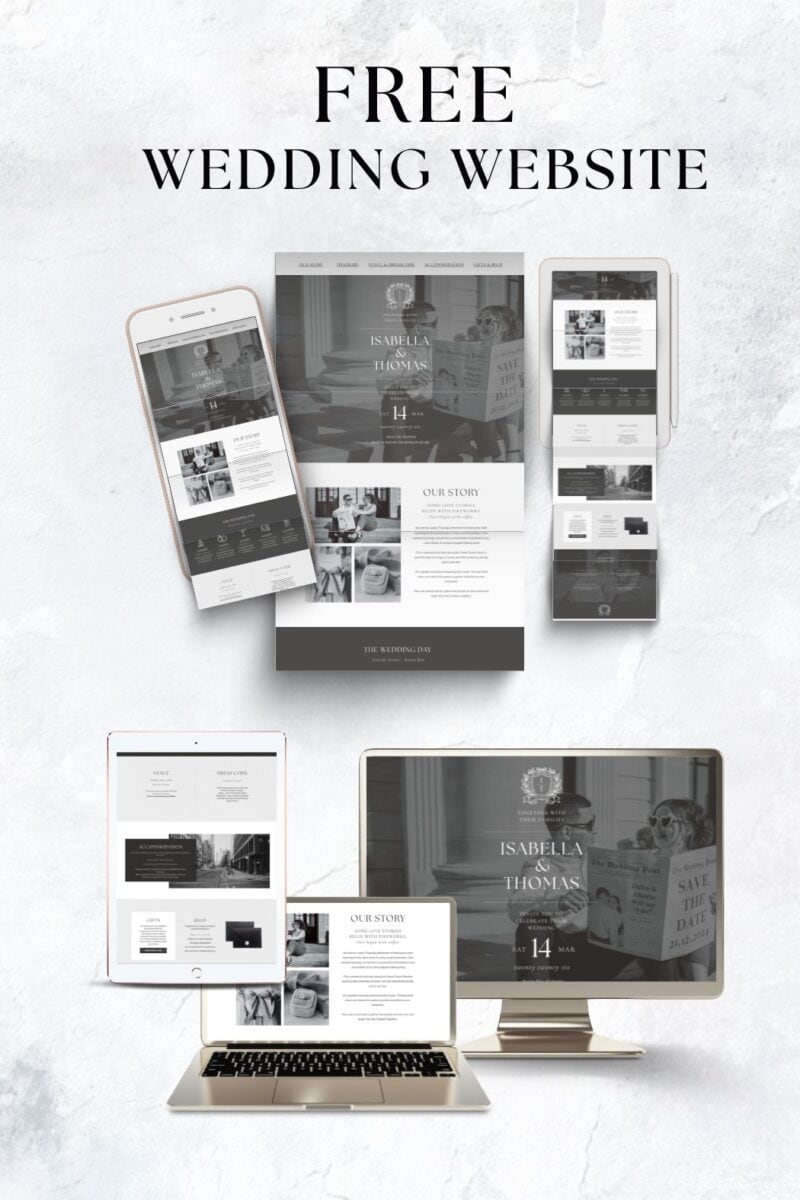
GRAB YOUR FREE WEDDING WEBSITE
More blogs you will love!
- How to Chase Wedding RSVPs Politely (Without Feeling Awkward)
- Wedding RSVP Questions You Should Ask Guests
- The Simple Wedding RSVP Tracker Every Couple Needs
- How to Track Wedding RSVPs Without Losing Your Mind
- Common Wedding Website Mistakes Couples Make (And How to Avoid Them)
- Wedding Website Checklist: Everything to Include Before You Launch Your Site
- Wedding Website FAQ Examples Guests Actually Need

- How to Create a Digital Save the Date Evite (With Our Free Canva Template!)

- 10 Things Every Modern Wedding Website Needs